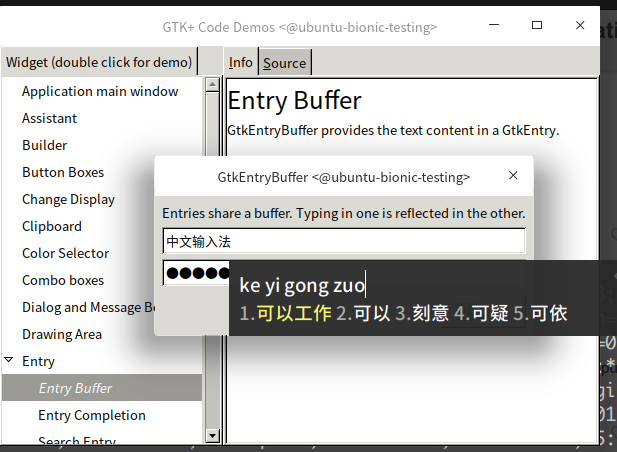
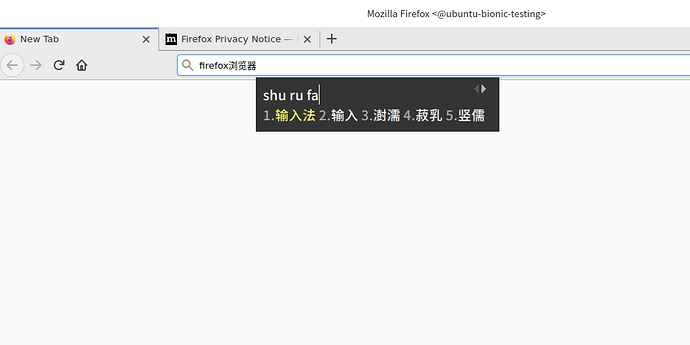
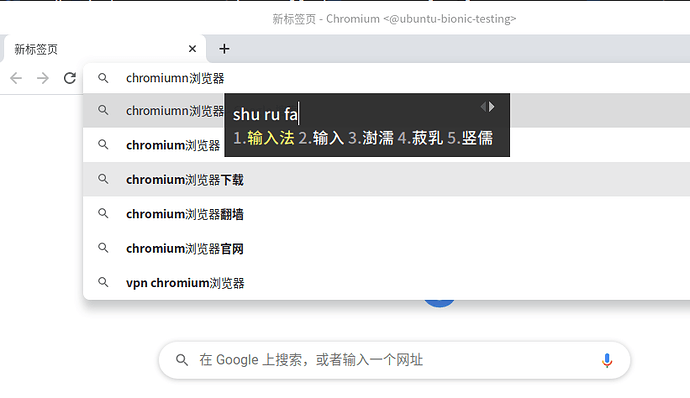
Hi, all, I find the solution (maybe). I use fcitx in my ubuntu 18.04 container, and it’s working. You may have a try with ibus.
TL;DR:
- You must set
locale in container the same as your host, MUST NOT use C/C.UTF-8/POSIX in container, otherwise the input method window will not show. For my environment, it’s LANG=zh_CN.UTF-8
- You must set the
XMODIFIERS environment variable in container the same as your host. For my environment, it’s XMODIFIERS='@im=fcitx'
- The correct
raw.idmap config for container, see: https://blog.simos.info/how-to-easily-run-graphics-accelerated-gui-apps-in-lxd-containers-on-your-ubuntu-desktop/. For example, your current user in host uid is 1000, and you want use non root user in container, which uid is also 1000, you should set: raw.idmap: both 1000 1000.
Full steps:
My instance is Ubuntu 18.04, and I use fcitx input method, maybe you can compare with ibus.
Here is my gui profile:
lxc show profile gui
# These environment variables only work for lxc exec.
# If you are not using lxc exec to access container
# you should set these environment vaiables manually
config:
  environment.DISPLAY: :0
  environment.PULSE_SERVER: unix:/tmp/.pulse-native
  environment.XMODIFIERS: '@im=fcitx'
  raw.idmap: both 1000 1000     # <=== Must fit for your environment
description: GUI LXD profile
devices:
  X0:
    path: /tmp/.X11-unix/
    source: /tmp/.X11-unix/
    type: disk
  mygpu:
    mode: "0666"
    type: gpu
  pulseaudio:
    path: /tmp/.pulse-native
    source: /run/user/1000/pulse/native
    type: disk
name: gui
Lanuch ubuntu bionic image from ubuntu-daily repo:
$ lxc launch ubuntu-daily:bionic ubuntu-bionic-testing -p default -p gui
Creating ubuntu-bionic-testing
Starting ubuntu-bionic-testing
I use non root user in the container, and Ubuntu official lxd image providers a ubuntu user by default. Other image maybe you should create a user by yourself.
# su will not pass root env, you should set the XMODIFIERS manually
$ lxc exec ubuntu-bionic-testing su - ubuntu

ubuntu@ubuntu-bionic-testing:~$ env
...
LANG=C.UTF-8   # <=== should change locale as same as host
DISPLAY=:0
...

# you can set to ~/.bashrc for permanent, you must keep XMODIFIERS variable as same as host
$ export XMODIFIERS=@im=fcitx
$ echo $XMODIFIERS
@im=fcitx

# Change locale to zh_CN.UTF-8, for other os you may use locale-gen manually
$ sudo apt update && sudo apt install -y language-pack-zh-hans
$ locale -a
C
C.UTF-8
POSIX
en_US.utf8
zh_CN.utf8   #<==== After install language-pack-zh-hans you can see this local
zh_SG.utf8
$ sudo localectl set-locale LANG=zh_CN.UTF-8
$ localectl
   System Locale: LANG=zh_CN.UTF-8        #<=== It's working
       VC Keymap: n/a
      X11 Layout: us
       X11 Model: pc105

$ locale  # current locale is still C.UTF-8, you must logout and login again
LANG=C.UTF-8
LANGUAGE=
LC_CTYPE="C.UTF-8"
LC_NUMERIC="C.UTF-8"
LC_TIME="C.UTF-8"
LC_COLLATE="C.UTF-8"
LC_MONETARY="C.UTF-8"
LC_MESSAGES="C.UTF-8"
LC_PAPER="C.UTF-8"
LC_NAME="C.UTF-8"
LC_ADDRESS="C.UTF-8"
LC_TELEPHONE="C.UTF-8"
LC_MEASUREMENT="C.UTF-8"
LC_IDENTIFICATION="C.UTF-8"
LC_ALL=

# After login again:
$ locale
LANG=zh_CN.UTF-8
LANGUAGE=
LC_CTYPE="zh_CN.UTF-8"
LC_NUMERIC="zh_CN.UTF-8"
LC_TIME="zh_CN.UTF-8"
LC_COLLATE="zh_CN.UTF-8"
LC_MONETARY="zh_CN.UTF-8"
LC_MESSAGES="zh_CN.UTF-8"
LC_PAPER="zh_CN.UTF-8"
LC_NAME="zh_CN.UTF-8"
LC_ADDRESS="zh_CN.UTF-8"
LC_TELEPHONE="zh_CN.UTF-8"
LC_MEASUREMENT="zh_CN.UTF-8"
LC_IDENTIFICATION="zh_CN.UTF-8"
LC_ALL=

$ export XMODIFIERS=@im=fcitx
Finally, install the fonts as you need, otherwise your font will not display on the graph. For example, I need the CJK fonts:
$ sudo apt install -y fonts-noto-cjk
Then you can use gtk-demo for testing:
$ sudo apt install -y gtk2.0-examples
$ gtk-demo
Note that you must install the fonts first, otherwise the font will not display.

And also, firefox and chromium should work too.
I hope this can help you. 


