But is it possible to separate Network Configuration into a separate profile?
I have an “easy” picture in front of my inner eye where there is Network configuration in the default profile like how it is now. And other Networks can also be defined as a Network only Profile.
If then selected the profile can add or override the existing Profiles Network.
I always prefer to have separate network profiles and storage profiles. Profiles IMHO is one the most powerful and under rated features in incus. I imagine profiles like a salad bar (each with different configurations). You can spin up a container/vm, passing different profiles on the fly based on your architectural design and you can make then land exactly how and where you want them to be - be it in different projects, different networks, different storage types.
Yes, you can split functionality in different profiles. I am not sure whether you are asking how does this splitting works.
There’s the default profile, that is used when you do not specify any profile at all. If you only specify some other profile, then the default is not used. Typically, you specify first the default profile, and then your new profile so that any new configuration is masking what is found in the default profile.
Some examples. Here is a default profile. It specifies two devices, with names eth0 (type nic, therefore it’s for networking) and root (type disk, therefore it’s for storage).
$ incus profile show default
config: {}
description: Default Incus profile
devices:
eth0:
name: eth0
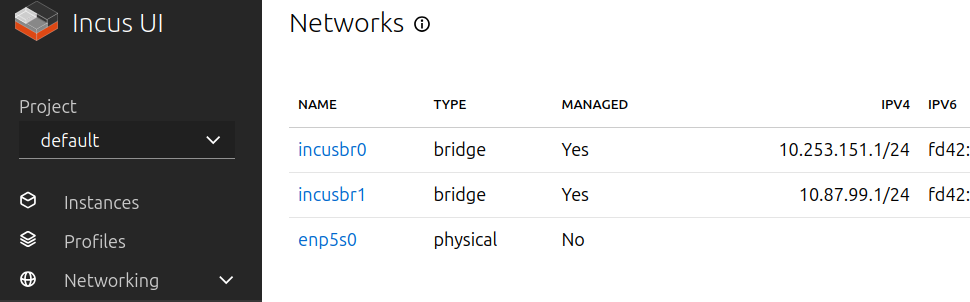
network: incusbr0
type: nic
root:
path: /
pool: default
type: disk
name: default
used_by:
Suppose you have created a new network, incusbr1, and you want to use that on selected containers.
$ incus profile create myincusbr1
Profile myincusbr1 created
$ incus profile show myincusbr1
config: {}
description: ""
devices: {}
name: myincusbr1
used_by: []
project: default
$ incus profile edit myincusbr1
... do your editing here ...
$ incus profile show myincusbr1
config: {}
description: ""
devices:
  eth0:
    name: eth0
    network: incusbr1
    type: nic
name: myincusbr1
used_by: []
project: default
$
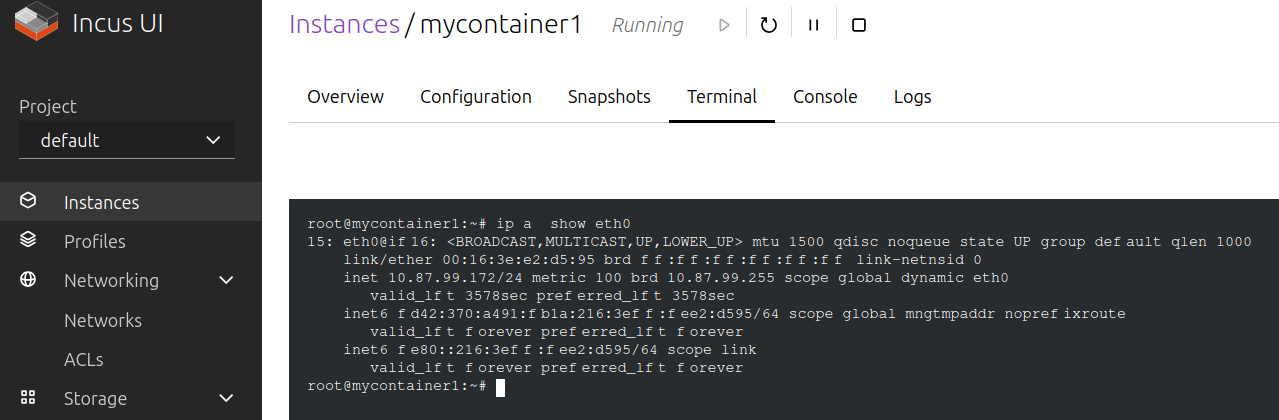
Then, you can launch a container that uses incusbr1 as follows. You first specify the default profile because you want to reuse the other configuration. Then, you specify the new profile that has a configuration eth0 that matches a configuration from the default profile. In Incus, the profile configurations are stacked. In the case of eth0 though, Incus will use the eth0 device from the myincusbr1 profile because the two have the same name.
As Simon wrote above - you can attach multiple profiles to the instance. However, there are pros and cons in this approach. Splitting separate devices, storage volumes, network interfaces by separate profiles increases flexibility, but increases infrastructure maintenance cost in case if you need attach more than one device of the same type. For example if any instance needs two or more network interfaces - you need be very caution with network interfaces naming in profiles as interfaces with the same name overrides each other.
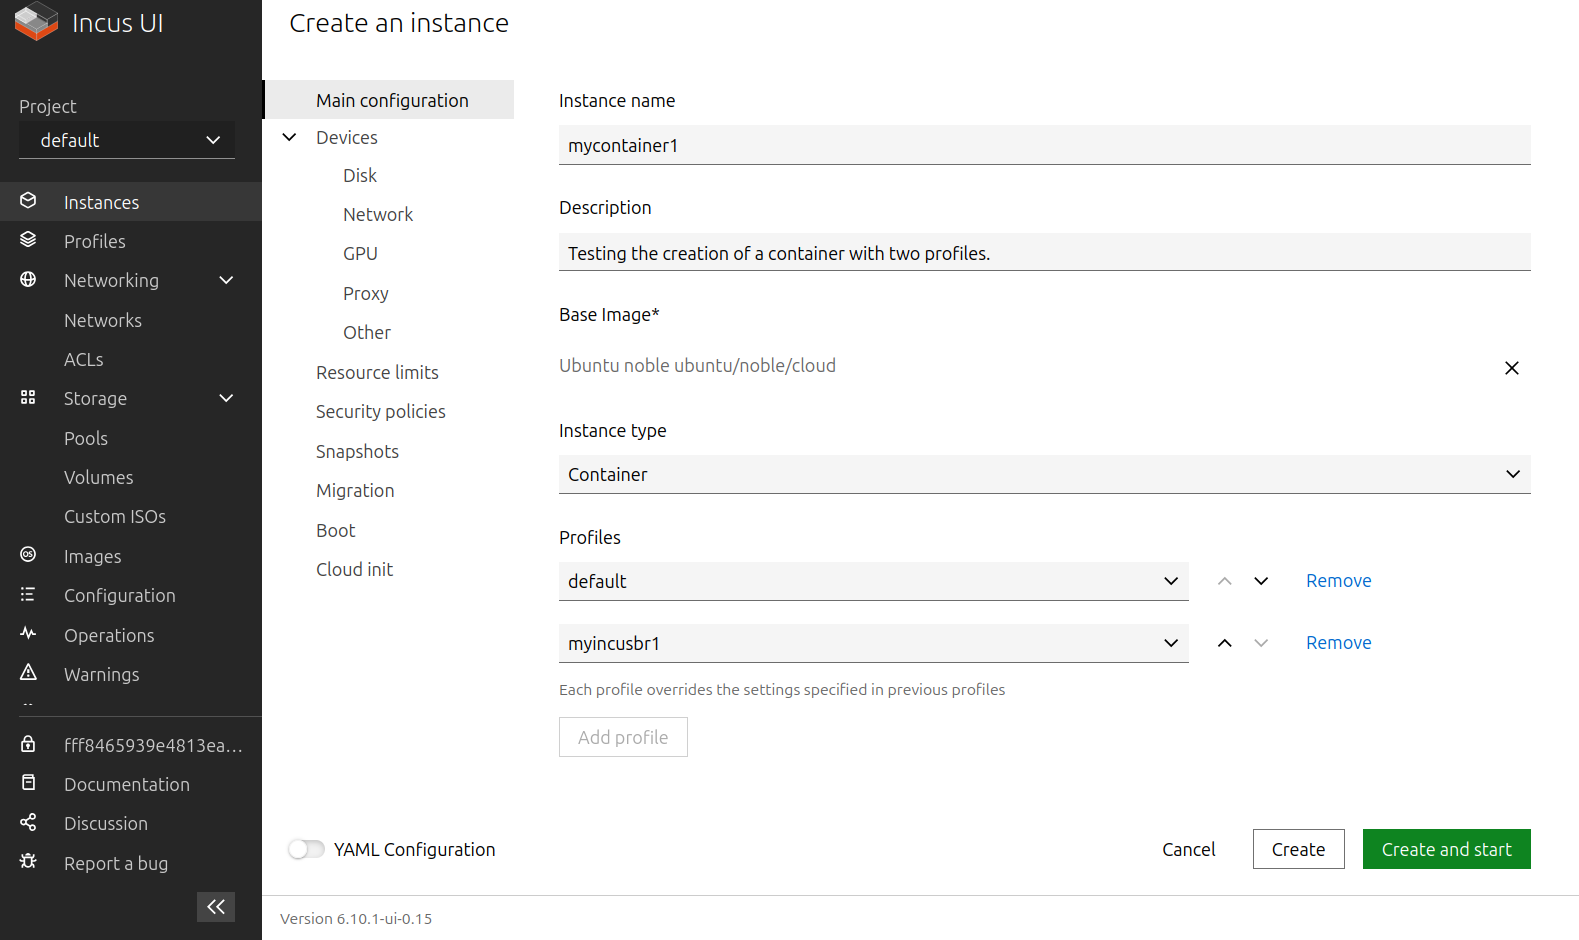
First, you create the additional Incus profile. In the following I created a profile just like my example above (eth0 on incusbr1). Then, when you create a new instance, you first need to specify the Base Image. By doing so, you can then specify more than Incus profile (and select the appropriate order).